AI-Powered 3D Modeling with
Blender MCP
Blender MCP is a plugin that allows you to control 3D modeling in Blender using natural language through Claude, Cursor, Windsurf, or VSCode.

How Claude Works with Blender MCP
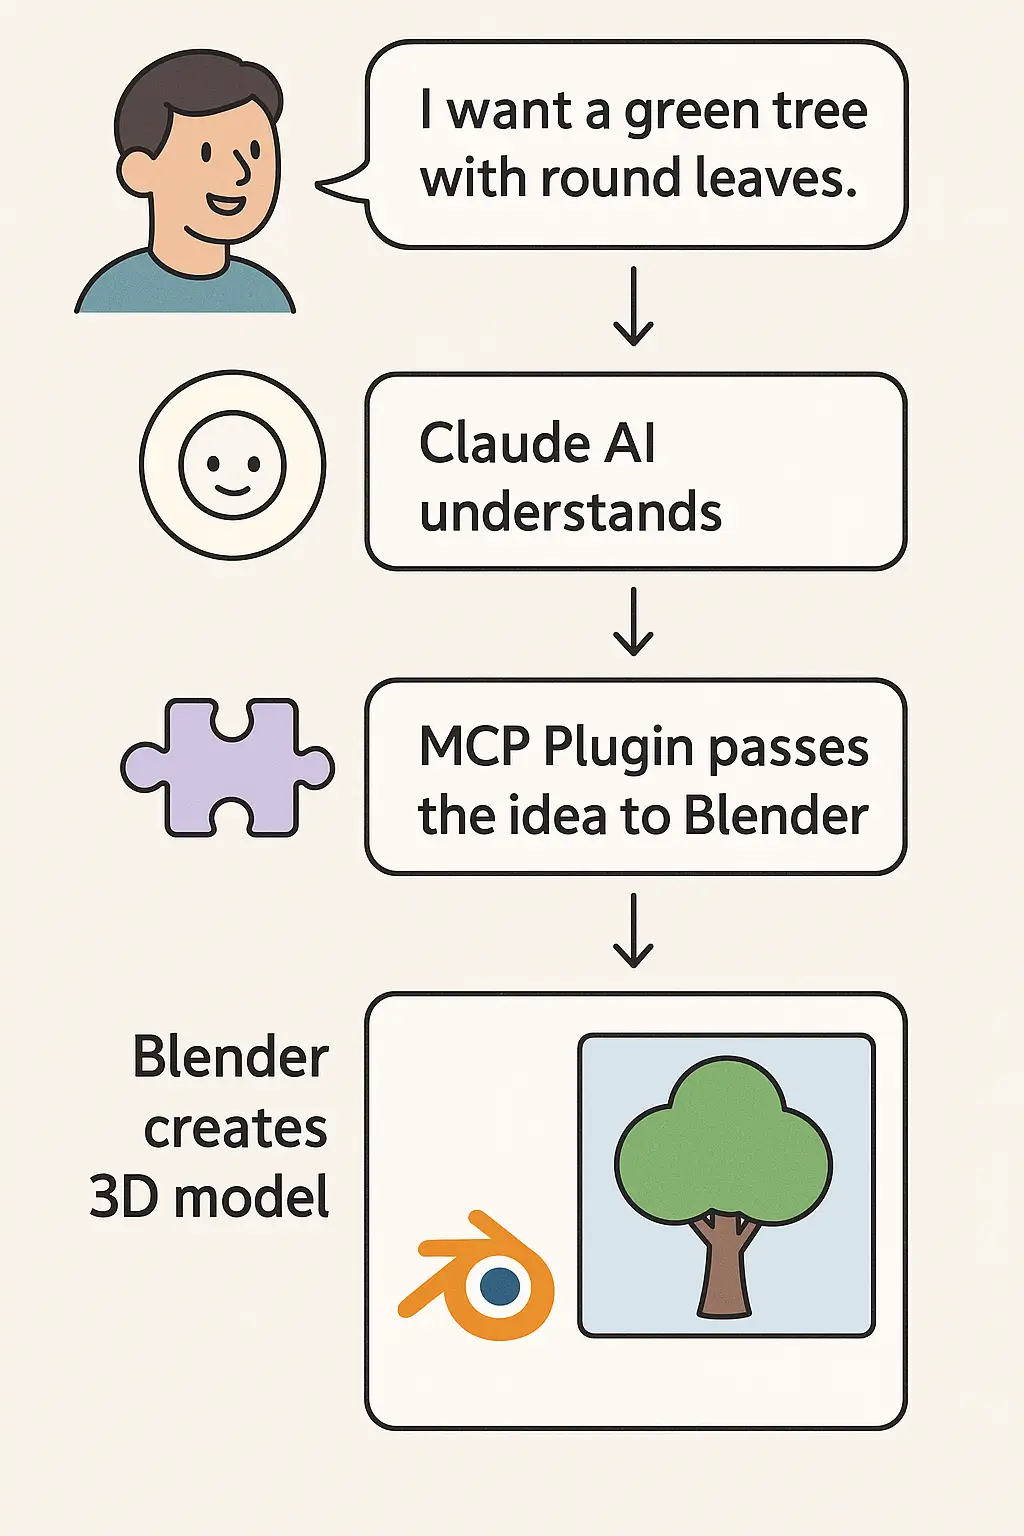
From natural language to 3D models — in just four simple steps.
Blender MCP Works – Step-by-Step
- Write a Simple Text Prompt
Example: "I want a green tree with round leaves." - Claude AI Understands Your Request
Claude AI processes your sentence and converts it into modeling instructions. - MCP Sends It to Blender
The MCP plugin acts as a translator, sending AI-generated commands to Blender. - Blender Creates the 3D Model
In just a few seconds, your custom 3D model appears on screen, fully generated from your description.
Set Up Blender MCP Quickly on Claude
Set up Blender MCP in just a few steps. No technical skills required.
Install Blender MCP in Blender
Download Blender MCP from GitHub and install it in Blender.
Download PluginConfigure MCP Server
Set up the MCP server to connect Blender with Claude AI.
View Full Installation GuideGetting Started with Blender MCP on Claude
Set up and use Blender MCP in minutes with this step-by-step guide.
Watch this 2-minute video to see Blender MCP in action.
🖥️ System Requirements
- Blender 3.0 or higher
- Python 3.10+ environment
- Claude API Key (e.g., claude-xxx)
- uv package manager
pip install uv
brew install uv
💻 Claude for Desktop Integration
- Go to Claude > Settings > Developer > Edit Config and open
claude_desktop_config.json. - Add the following configuration:
{ "mcpServers": { "blender": { "command": "uvx", "args": [ "blender-mcp" ] } } }🔗 MCP Integration in Different Environments
Cursor Integration
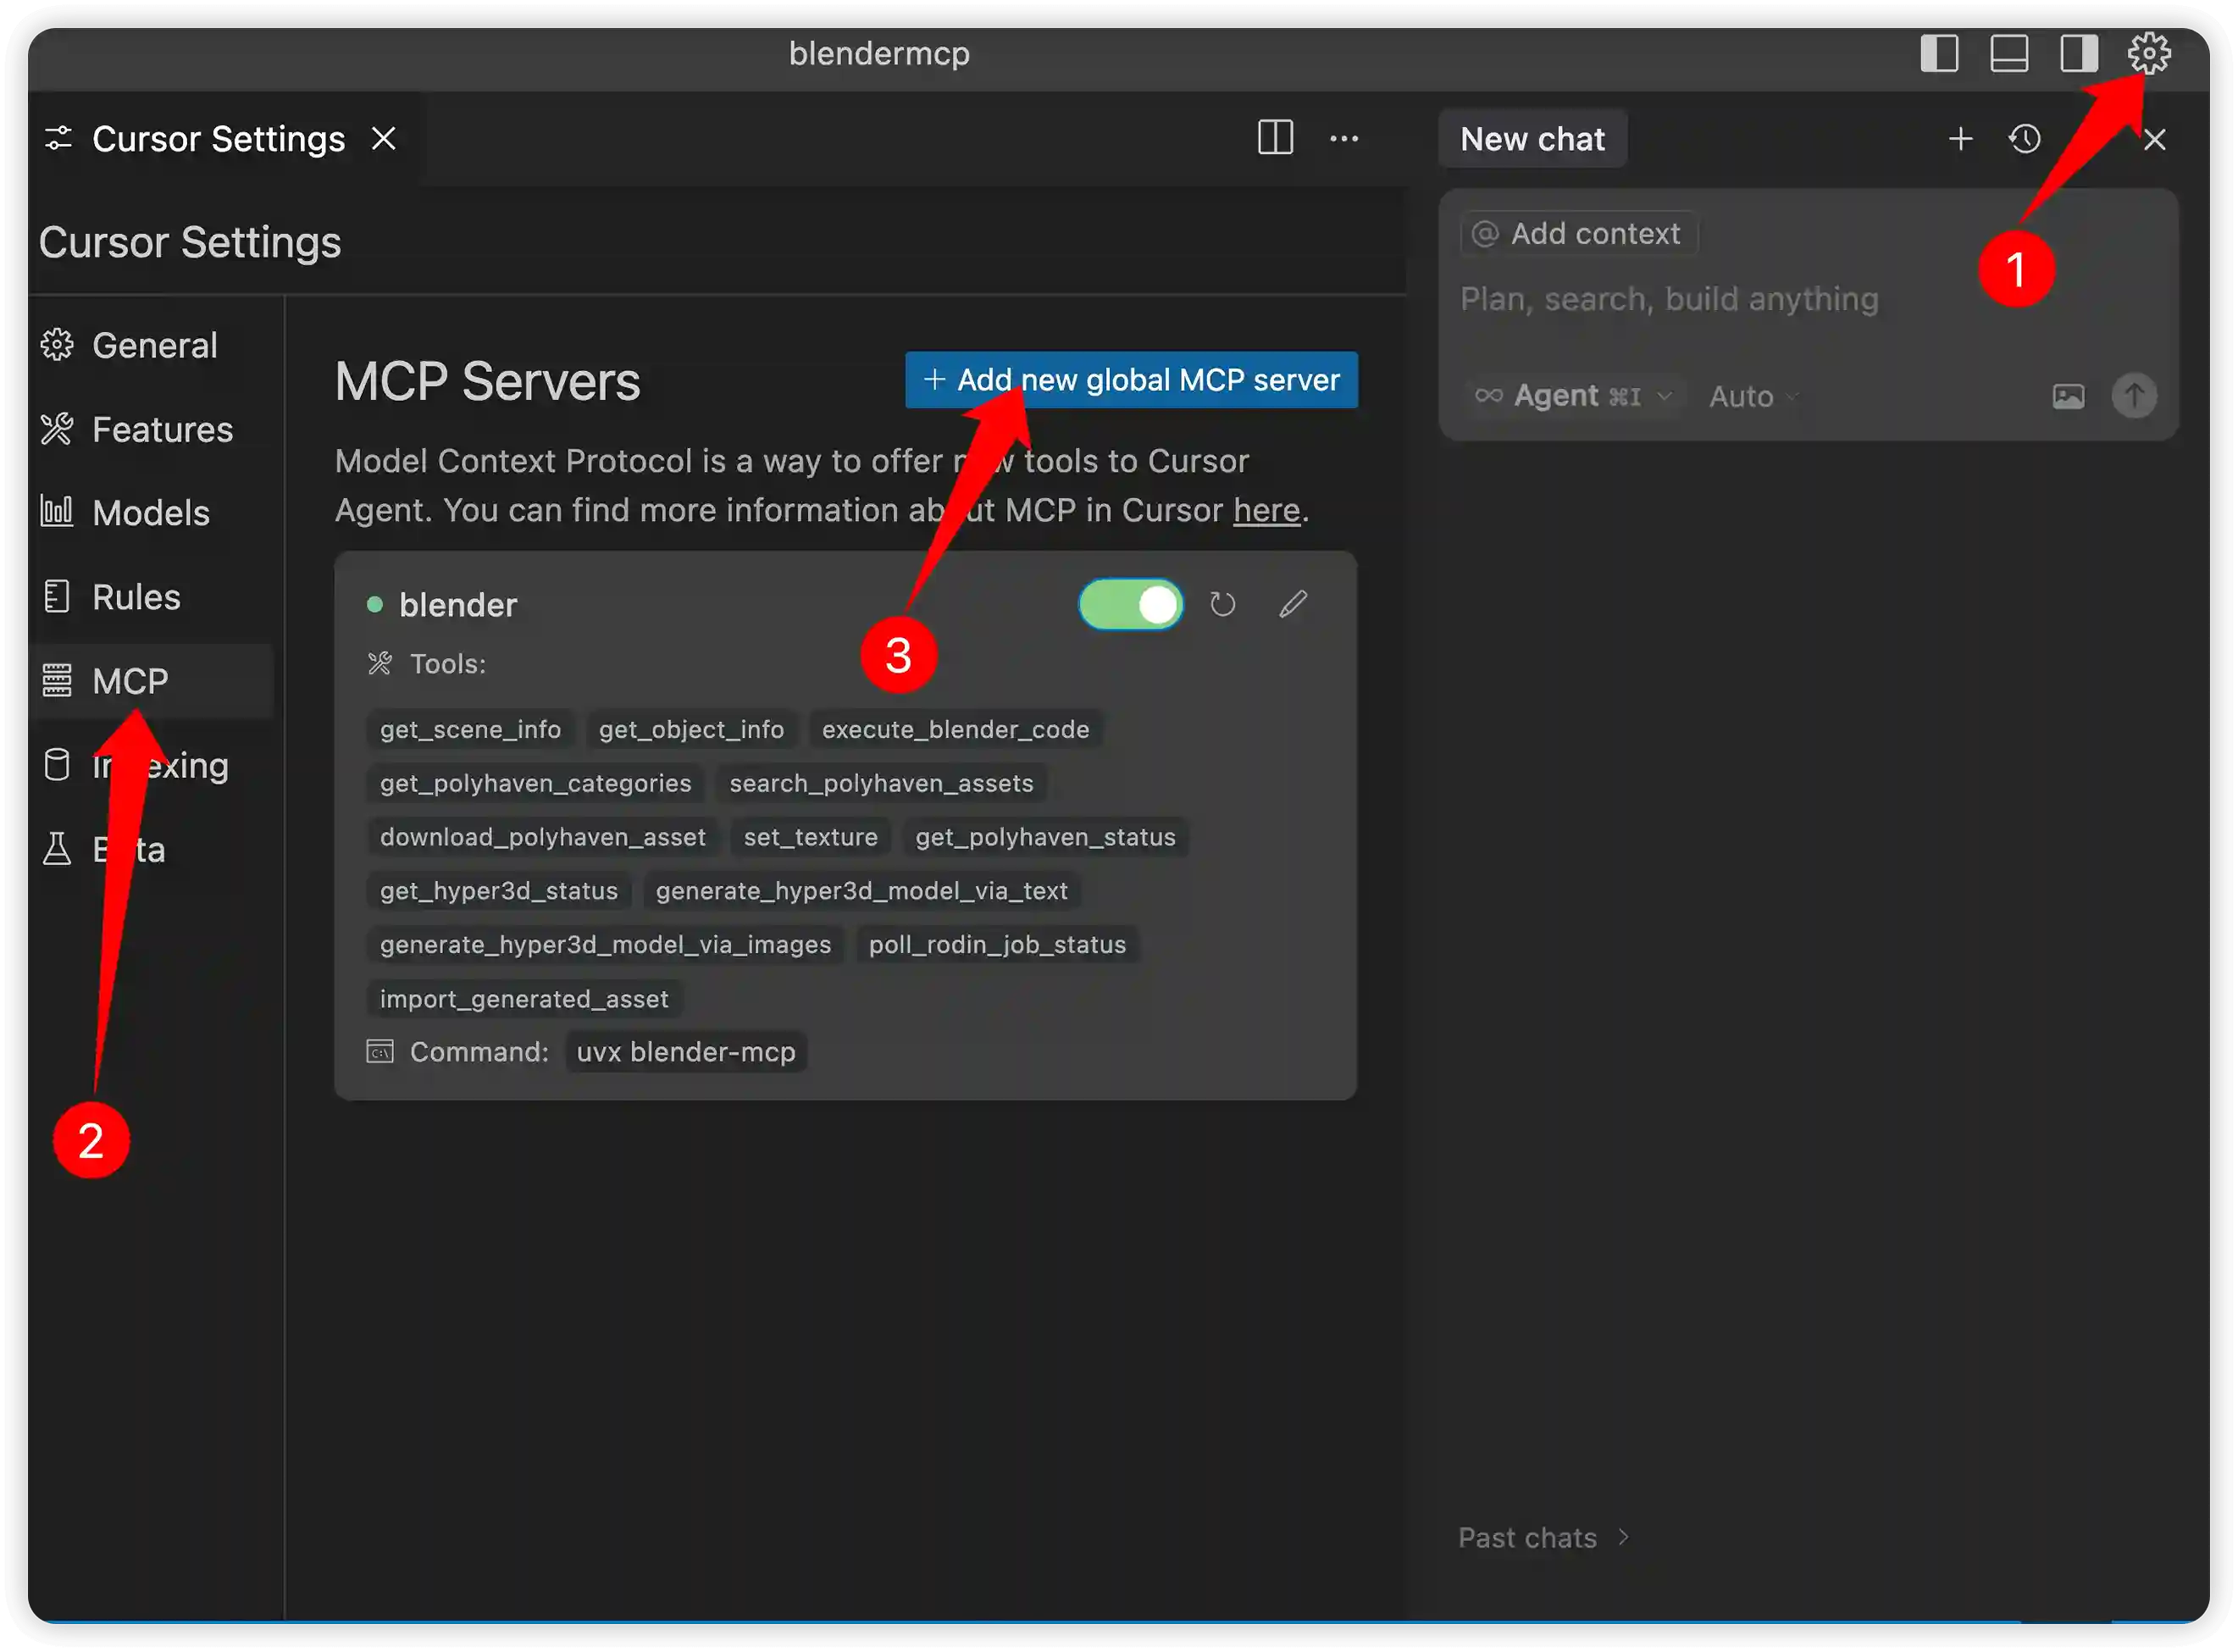
Go to Cursor Settings > MCP and paste the following command:
uvx blender-mcp
Windsurf Integration
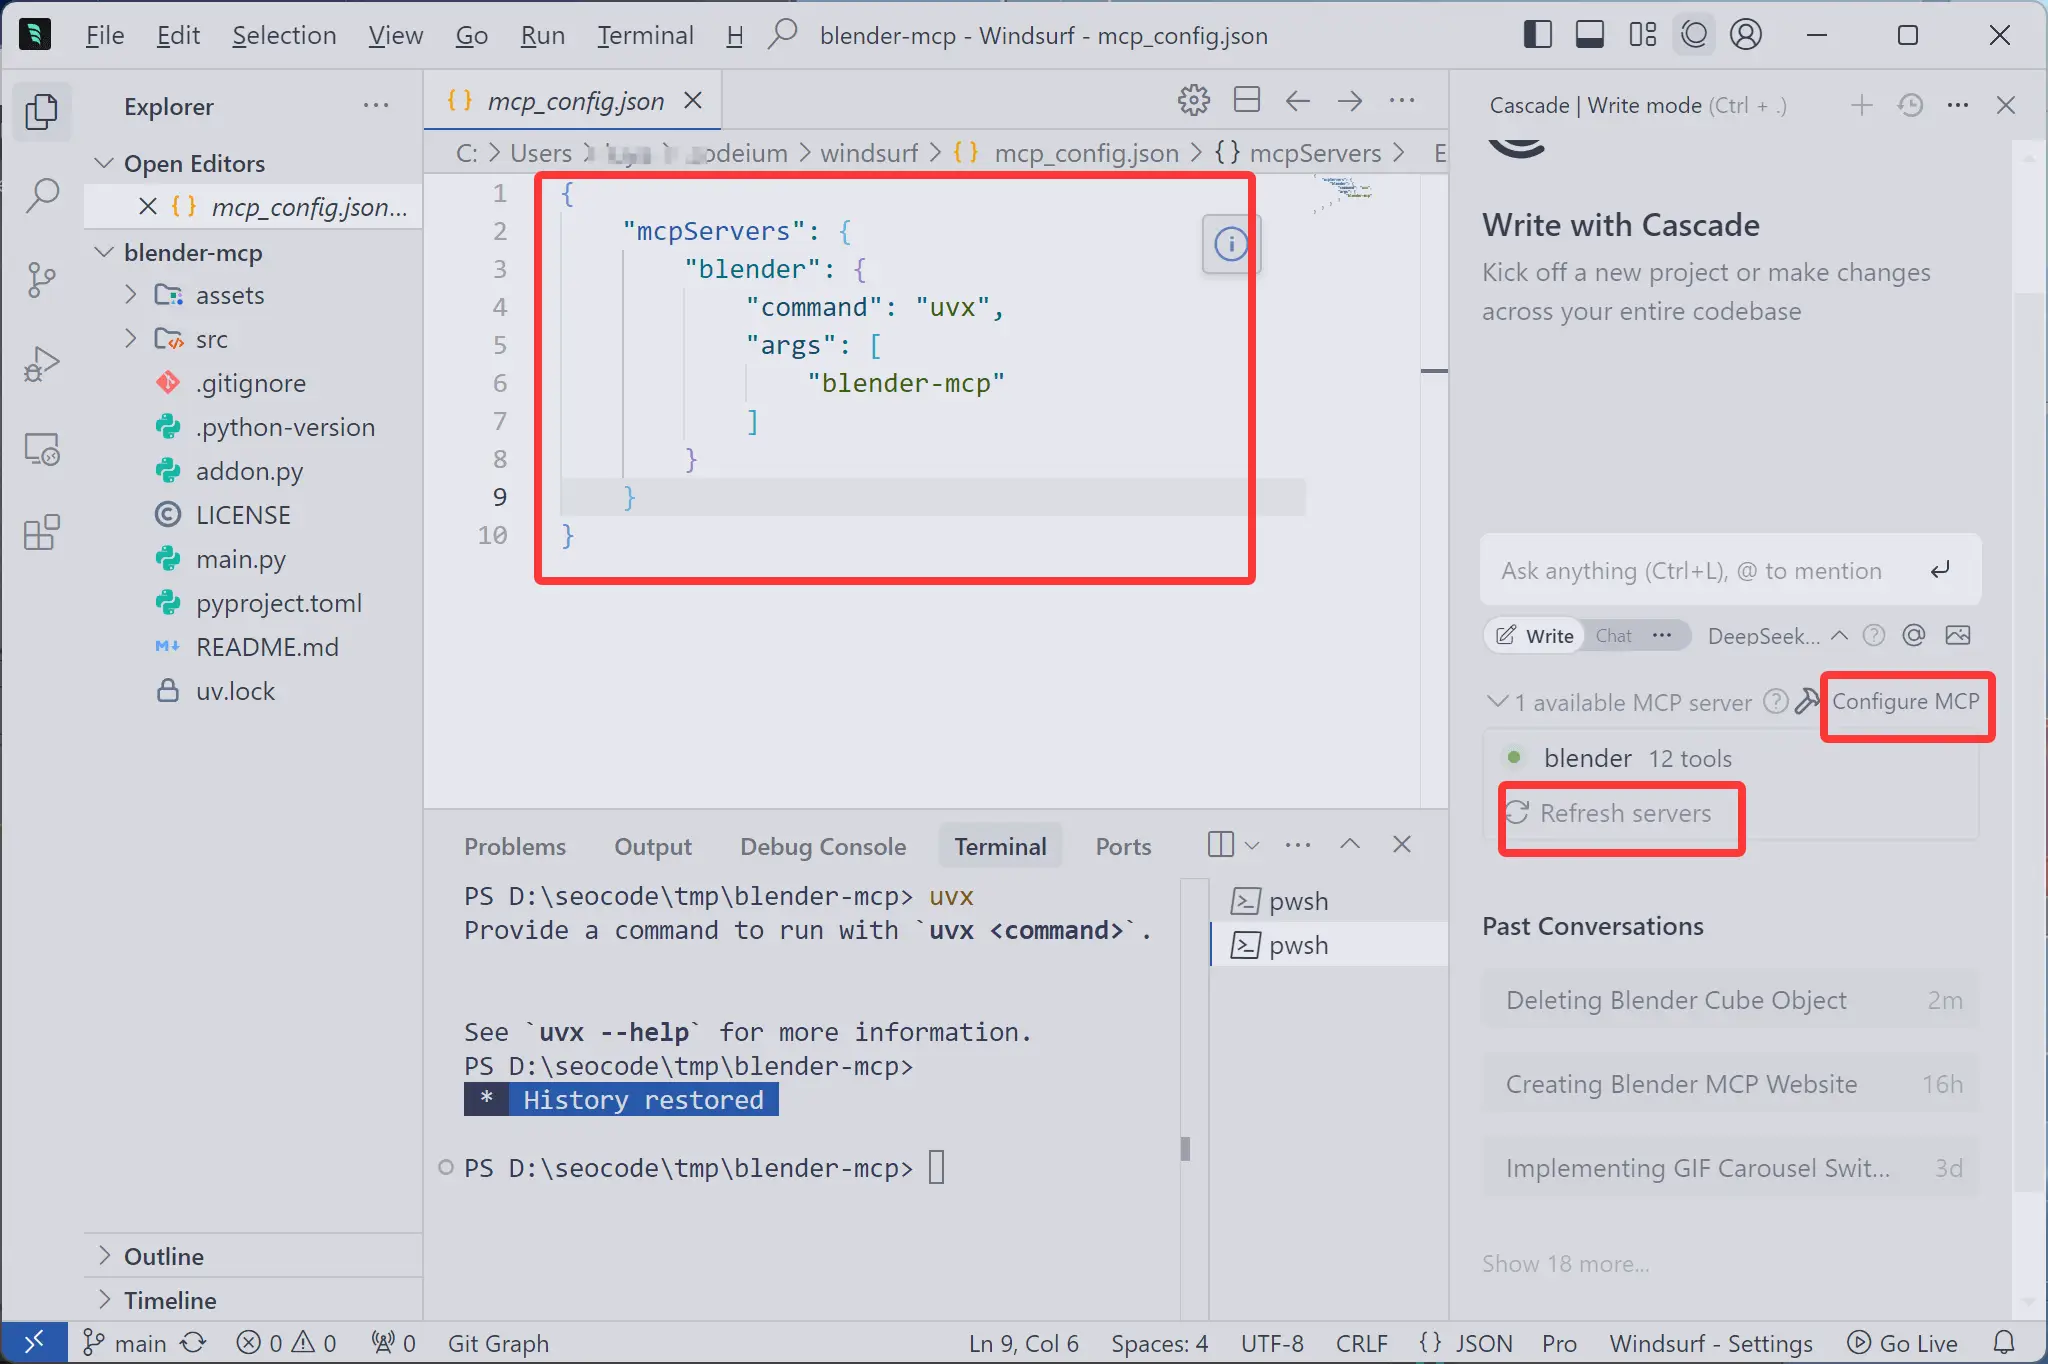
Go to Windsurf Settings > MCP and paste the following command:
uvx blender-mcp
VSCode Integration (using Roo Cline)
- Install the Roo Cline extension in VSCode
 VSCode Step 1
 - Set your API key
 VSCode Step 2
 - Configure the MCP server with the command uvx blender-mcp
 VSCode Step 3
uvx blender-mcp
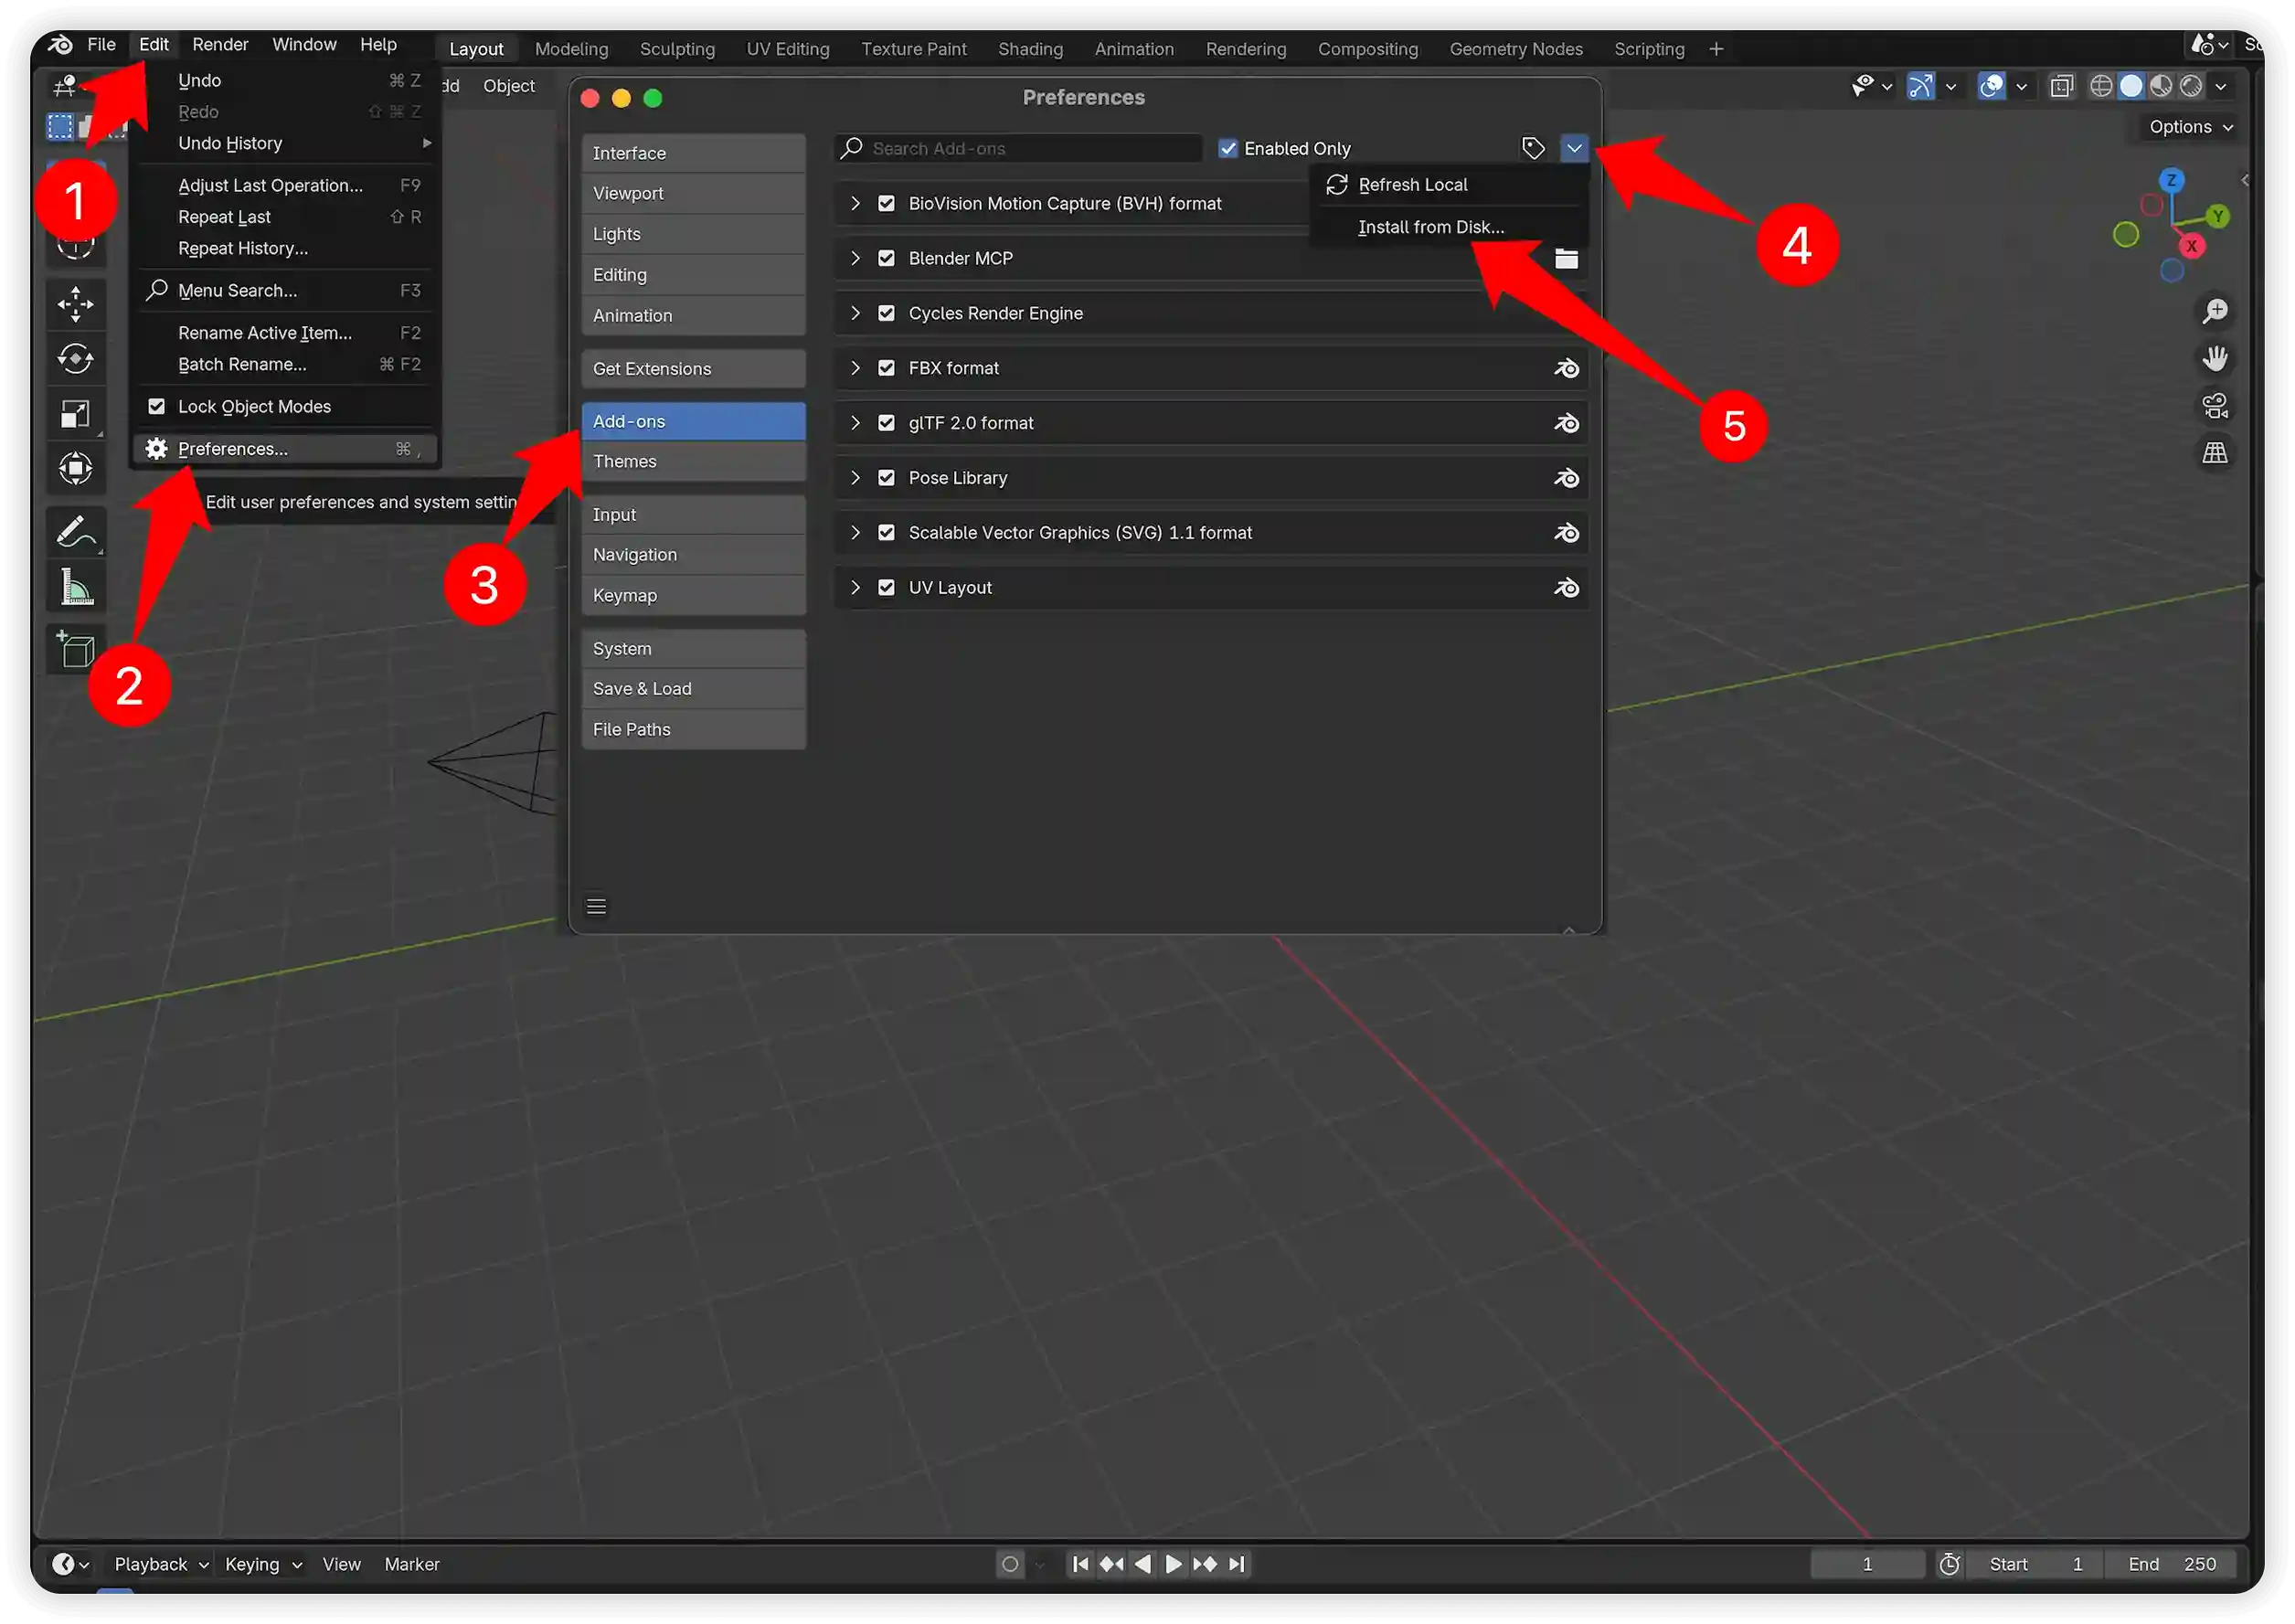
🧩 Installing the Blender Plugin
- Download the latest version of Blender MCP.
- Open Blender.
- Go to Edit > Preferences > Add-ons.
- Click Install... and select the addon.py file.
- Enable the plugin by checking the box next to Interface: Blender MCP.
If Blender MCP was previously installed, uninstall it before installing the new version.
- Open Blender. Go to Edit > Preferences > Add-ons.
- Locate Interface: Blender MCP and uncheck the box to disable it.
- Click the arrow next to it, then click Remove.
- Restart Blender.
- Install the updated version.
🚀 Usage Instructions
Starting the Connection
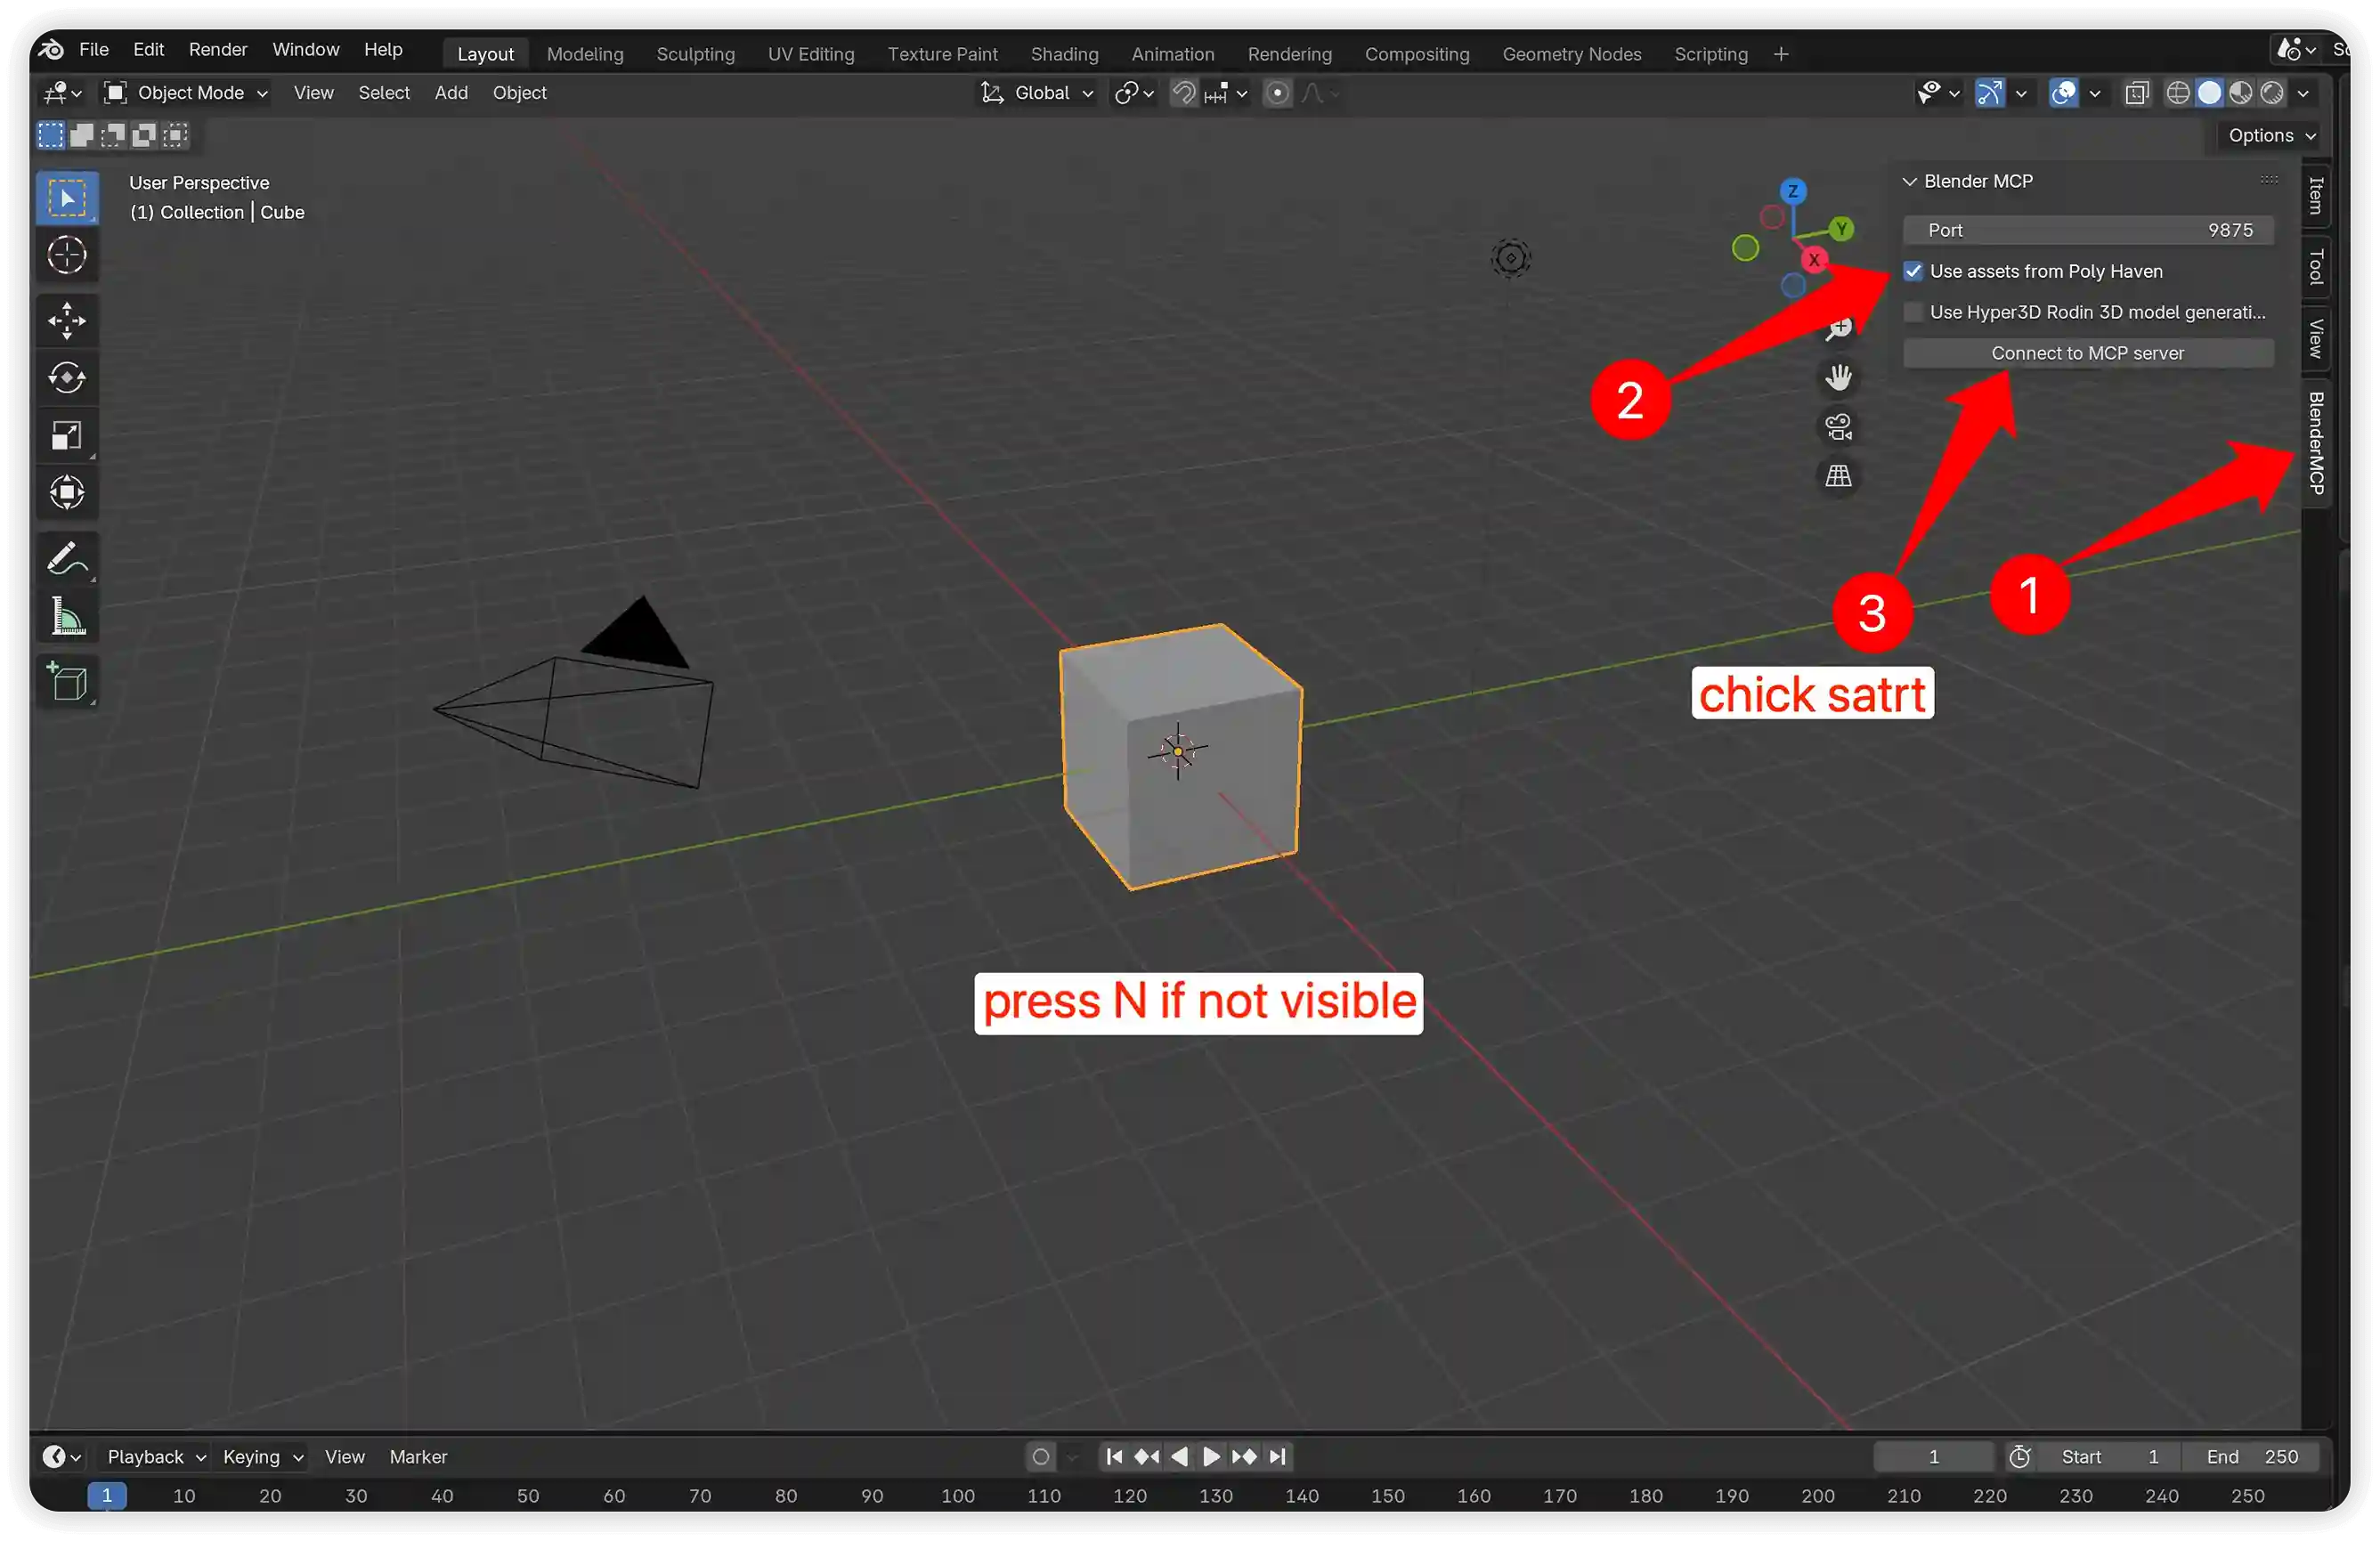
- In Blender, open the 3D View sidebar (press N if it is not visible).
- Select the BlenderMCP tab.
- (Optional) Enable the Poly Haven checkbox to use Poly Haven assets.
- Click Start MCP Server.
- Confirm that the MCP server is running in your terminal.
Using with Claude
After the config file is set up in Claude and the plugin is active in Blender, a hammer icon will appear.
This icon gives you access to Blender MCP tools.
Example Commands
- Create a low poly scene in a dungeon, with a dragon guarding a pot of gold
- Create a beach vibe using HDRIs, textures, and models like rocks and vegetation from Poly Haven
- Get information about the current scene, and make a threejs sketch from it
- Make this car red and metallic
- Create a sphere and place it above the cube
- Make the lighting like a studio
- Point the camera at the scene, and make it isometric
- Create a sci-fi corridor with glowing walls and a metal floor
- Build a forest scene with scattered trees, rocks, and a small river
- Add a glass sphere on top of a wooden table
- Make this object matte black with rough surface finish
- Use Poly Haven textures to create a cozy indoor living room
- Set up HDRI lighting for a sunset look
- Rotate the camera 45 degrees and point it at the center of the scene
- Get a list of all objects in the scene and their positions
- Export the scene as a glTF file
- Add soft shadows and reduce overall brightness by 20%